Use Cases
Docs
Blog Articles
BlogResources
Pricing
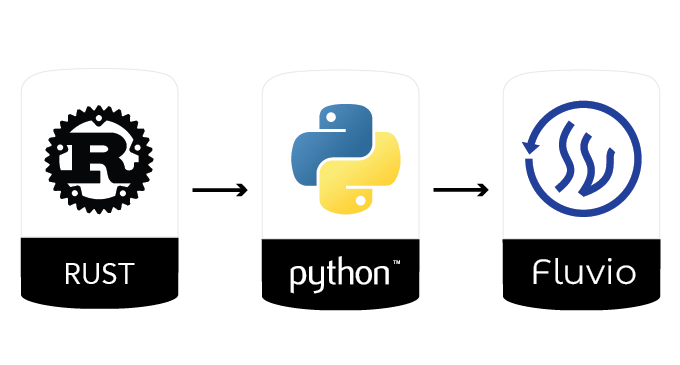
PricingHow we built our Python Client that's mostly Rust

Engineer, InfinyOn

This week, we’re happy to announce the addition of a Python client library for Fluvio. Using the Python client is just as easy as using our other clients. Check out the hello world in Python tutorial or documentation for usage.
In this post, we’ll talk about how we were able to leverage some of the great Rust tools to build a Python client without writing much Python itself.
Overview
In short, we will:
- use flapigen to define how our Rust structs will go across the FFI.
- use the rust-cpython extension in our Python project and call it.
Setup
To get started, we’ll create a new project folder that’s set up for both
Rust and Python, using cargo and venv.
cargo new --lib my-python-lib
cd my-python-lib
python -m venv venv
source venv/bin/activate
The above creates a Rust crate named my-python-lib, then sets-up a Python
virtual environment.
Rust glue
We’ll need to add this to your Cargo.toml:
[lib]
crate-type = ["cdylib"]

[dependencies]
cpython = { version = "0.5", features = ["extension-module"] }

[build-dependencies]
flapigen = "0.6.0-pre7"
The crate-type = ["cdylib"] tells Rust to build our crate as a C-compatible
dynamic library rather than a typical crate. This crate type will allow our Python code
to interact with our library as if it were compiled C code rather than Rust.
Now we’ll create a build script in build.rs by adding the following:
use flapigen::{LanguageConfig, PythonConfig};
use std::{env, path::Path};

fn main() {
    let in_src = Path::new("src").join("glue.rs.in");
    let out_dir = env::var("OUT_DIR").unwrap();
    let out_src = Path::new(&out_dir).join("glue.rs");

    let python_cfg = PythonConfig::new("my_python_lib".to_owned());
    let flap_gen =
        flapigen::Generator::new(LanguageConfig::PythonConfig(python_cfg)).rustfmt_bindings(true);
    flap_gen.expand("python bindings", &in_src, &out_src);
    println!("cargo:rerun-if-changed={}", in_src.display());
}
The code sets up flapigen to run on our project. At build time,
it will read the “glue code” we write in src/glue.rs.in, and generate
Rust code to interact with Python and place it in ${OUT_DIR}/glue.rs.
Now we’ll add a src/glue.rs.in file with something like the following:
pub struct Foo {
    val: i32
}
impl Foo {
    pub fn new(val: i32) -> Self {
        Self {
            val
        }
    }
    pub fn set_field(&mut self, new_val: i32) {
        self.val = new_val;
    }
    pub fn val(&self) -> i32 {
        self.val
    }
}
foreign_class!(class Foo {
    self_type Foo;
    constructor Foo::new(_: i32) -> Foo;
    fn Foo::set_field(&mut self, _: i32);
    fn Foo::val(&self) -> i32;
});
This simple example was published in the flapigen book and we can copy and paste it here.
The src/lib.rs should currently have some basic tests. We’ll change it to the following:
#![allow(non_snake_case, unused)]

include!(concat!(env!("OUT_DIR"), "/glue.rs"));
This is a typical Rust pattern when using build scripts. The code takes the
file in ${OUT_DIR}/glue.rs and includes the contents into src/lib.rs in the
build directory. The result will be as if we hand-wrote the generated code in
our lib.rs file.
This section uses flapigen to expand the foreign_class macro into many
cpython functions as an extension module, and cargo compiles it as a
cdylib. If you want to see what that looks like, install cargo-expand
and run cargo expand. You’ll get a lot of generated rust code.
Python Glue
In the setup, we created a virtual environment, and now we’ll need to
install some Python tools via:
$ source venv/bin/activate && pip install setuptools-rust
Now to create a python package, you create a file called setup.py with:
from setuptools import setup
from setuptools_rust import Binding, RustExtension

setup(
    name="my-python-lib",
    version="1.0",
    rust_extensions=[RustExtension("my_python_lib", binding=Binding.RustCPython)],
    # rust extensions are not zip safe, just like C-extensions.
    zip_safe=False,
)
This is the most basic setuptools-rust setup, except for using
RustCPython as the binding.
To build the Rust and the Python packages just run python setup.py develop.
Python calls cargo and moves cdylib into your local directory.
Testing it all out
Create a simple.py script with the following in it:
from my_python_lib import Foo
foo = Foo(1)
print(foo.val())
foo.set_field(11)
print(foo.val())
Running the script via python simple.py should result in:
$ python simple.py
1
11
And there you go, you’ve called Rust from Python!
Conclusion
You can get the source for this post in our fluvio-demo-apps-rust repository.
These are just the basics for setting up a Python wrapper. In the Fluvio Python Client, the Rust crate is _fluvio_python; a private python module that wraps the rust structs with python classes, giving us nice documentation generation.
Packaging, testing, and publishing on pypi is beyond the scope of this blog. Checkout the Makefile and the github publishing workflow for additional information.