Increasing our development confidence and productivity with Bors


Engineer, InfinyOn

Lately on Fluvio, we’ve been doing a lot of work to improve our productivity and speed up our development cycles. One of the easiest and most effective things we’ve done in order to achieve this goal is to integrate the Bors-ng GitHub bot into our development workflow. In this post, I’ll talk about some of the problems we were facing, what Bors is and why it was a good solution for our team, and how adopting it has helped us to increase our development speed and confidence. I’ll then describe how to set up Bors for your own repository and what to expect out of the new development workflow.
What even is Bors?
Bors is a GitHub application/bot that you put in charge of merging your PRs into master. Importantly, it merges commits in such a way that ensures that the exact code that lands in master is the code that has been tested by your CI workflow, which, perhaps surprisingly, is not how typical merges work. The problem with classic merges is that they can cause problems such as semantic merge conflicts, in which two separate PRs each make changes that work in isolation, but which cause failures when they are merged together. This problem occurs because regular GitHub CI workflows are run on the PR’s branch before it’s merged into master, rather than after.
To solve this problem, Bors merges branches by first creating a staging branch at the
head of master, then merging your branches into it. This creates a merged branch that
is equivalent to what would previously have been pushed directly to master, except now
there is an opportunity to run CI workflows on this already-merged branch to decide
whether it should be accepted or rejected. If the CI workflow fails, then Bors simply
does not update master. If CI passes, then Bors fast-forwards master to match the
merged commit on the staging branch - the same exact commit which has already been tested.
This style of CI workflow - merging, testing, then fast-forwarding - greatly increases
our confidence in the correctness of the code living in master.
Hands-on: The Bors workflow
To give you a more concrete sense of how Bors operates, let me walk you through the experience as a developer using Bors on a day-to-day basis. Essentially, we follow these steps when working on a PR:
- Push code changes to your branch and open a PR
- Ensure your CI jobs are in a passing state
- Get reviews and approvals from team members
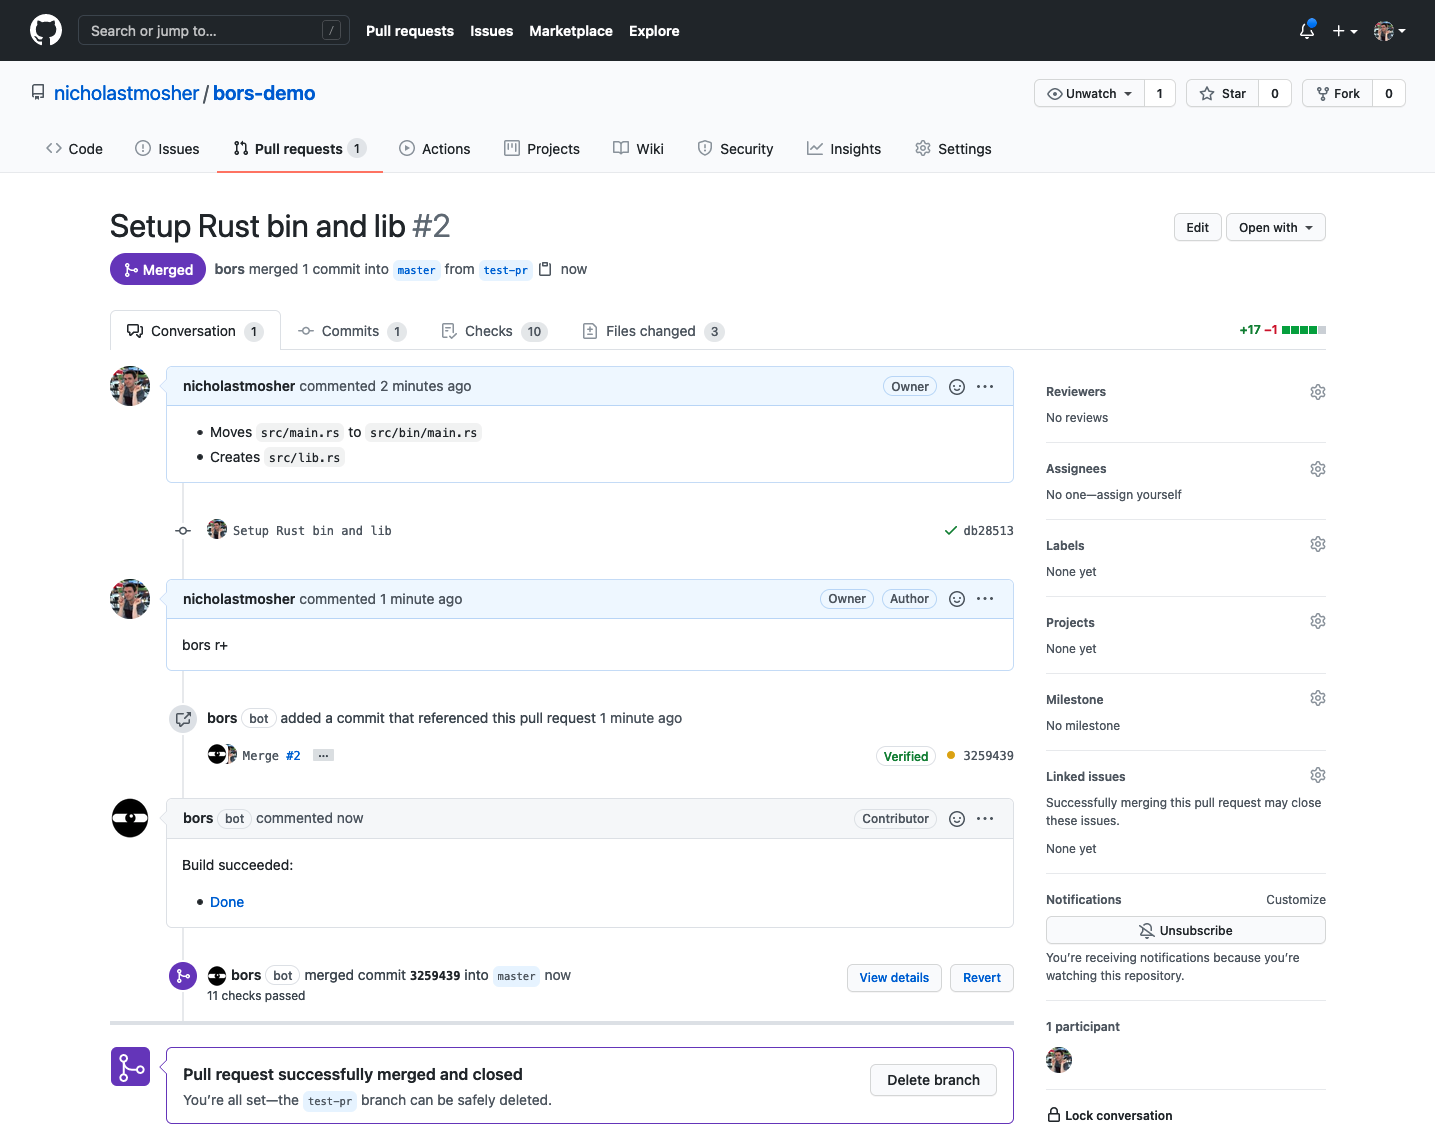
- When ready to merge, write a comment with the text “bors r+”
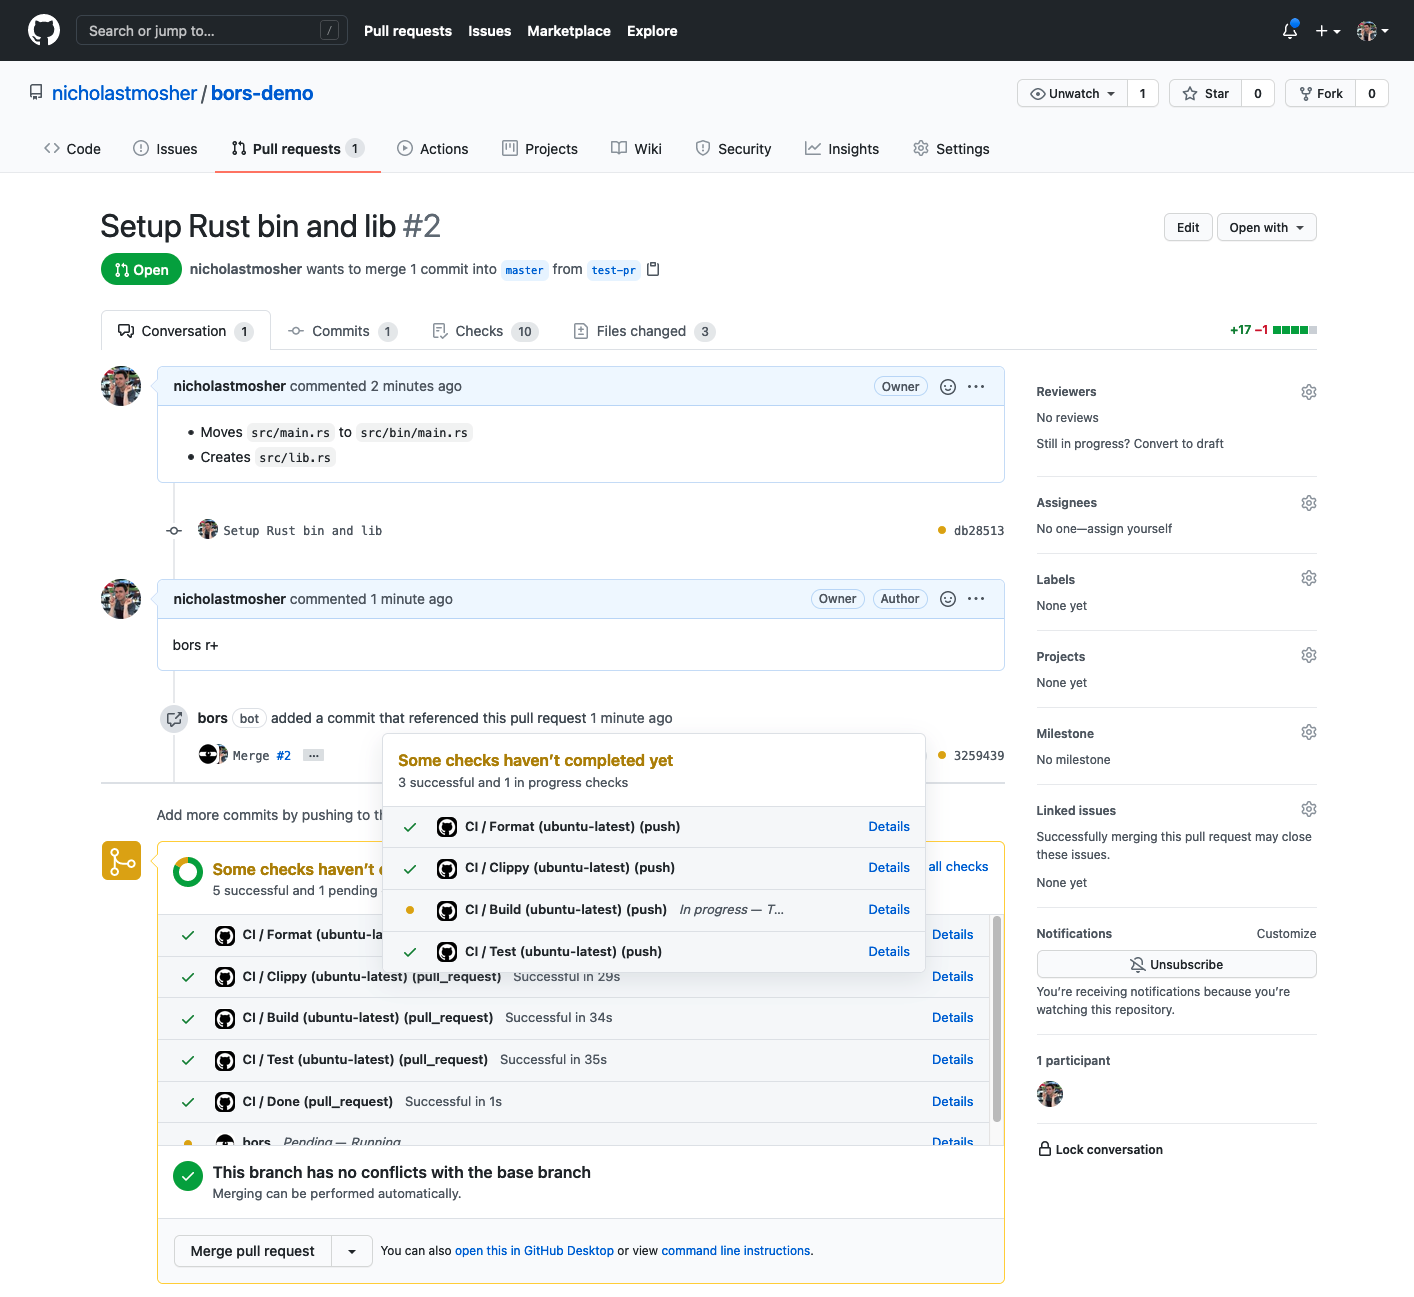
See how Bors creates a staging branch at master, then merges the PR into it.
Notice that you still have to supply your own CI job definition, and that your CI may run each time new commits are pushed to a branch. The only difference in the development process is when it comes time to actually merge the branch. Instead of using GitHub’s big green “Merge/Squash/Rebase” button, we simply tell Bors that we think this PR is ready to merge.
When we say “bors r+”, we tell Bors to add this PR to the “ready queue”.
When there are one or more PRs in the ready queue, Bors will attempt to batch together
all the ready PRs, merge them into the staging branch (which, remember, begins at the
head of master), and run CI once again on the merged staging branch. Bors will watch
the status of the CI jobs, and once all the required jobs have passed, it will push
the staging branch to master, which is guaranteed to be a fast-forward.

Increased Productivity
I want to touch on one of the nice side effects of using Bors to merge PRs. It has actually helped us to reduce the amount of time we spend on preparing and babysitting PRs. Prior to using Bors, one of the strategies we used to avoid semantic merge conflicts was to require all branches to be “up-to-date with master” before merging. This is enforceable by GitHub and essentially means that you need to rebase against master any time another change lands before yours does. Because of this, we would often find ourselves trapped in a vicious cycle:
- Get the PR tested, approved, and ready to go
- Get ready to press the Big Green Merge Button
- Find out another PR was merged first and need to rebase
This was especially painful because after rebasing, we would need to once again wait on our CI jobs to pass and hope that we don’t get beaten to the merge again. One way to avoid this problem would have been to coordinate with team members before trying to merge PRs, but that requires more time and synchronization across the entire team, and does not scale well.
Using Bors allows us to sidestep these issues entirely by simply letting it manage the merging process. After sending “bors r+” on a PR, you can usually move on and work on the next thing without needing to keep it in the back of your mind. The exception to this is if Bors finds a merge conflict or semantic conflict between your PR and another one that came before yours in the queue. Note, however, that in this scenario you already would have needed to fix regular merge conflicts, and that Bors provides the benefit of notifying you when a semantic conflict causes a failure, which previously would have failed after reaching master rather than before.
Setting up Bors on a GitHub repository
Like I mentioned before, Bors is a GitHub bot, so setting it up is a pretty straightforward process. In order to use it, you’ll need to first add the Bors application to the GitHub account where the repositories you want to use it live. Then, you need to grant it access to some or all of the repositories in that account. You can start this process by visiting the Bors website and clicking “Log into dashboard”. This should prompt you to log in with GitHub or something similar. I have already added Bors to an account previously, so the steps you take may be slightly different from the ones I show, but they should be similar enough and very easy to follow.
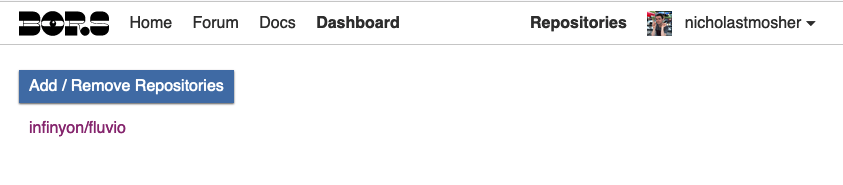
On my dashboard, I already have the infinyon/fluvio repository added to Bors, but if you’re
starting from scratch you will probably get a prompt right away to add Bors to an account
and a repository. If you are adding a second repository like I am for this demonstration,
there will be a Repositories page where you can add a new repository.
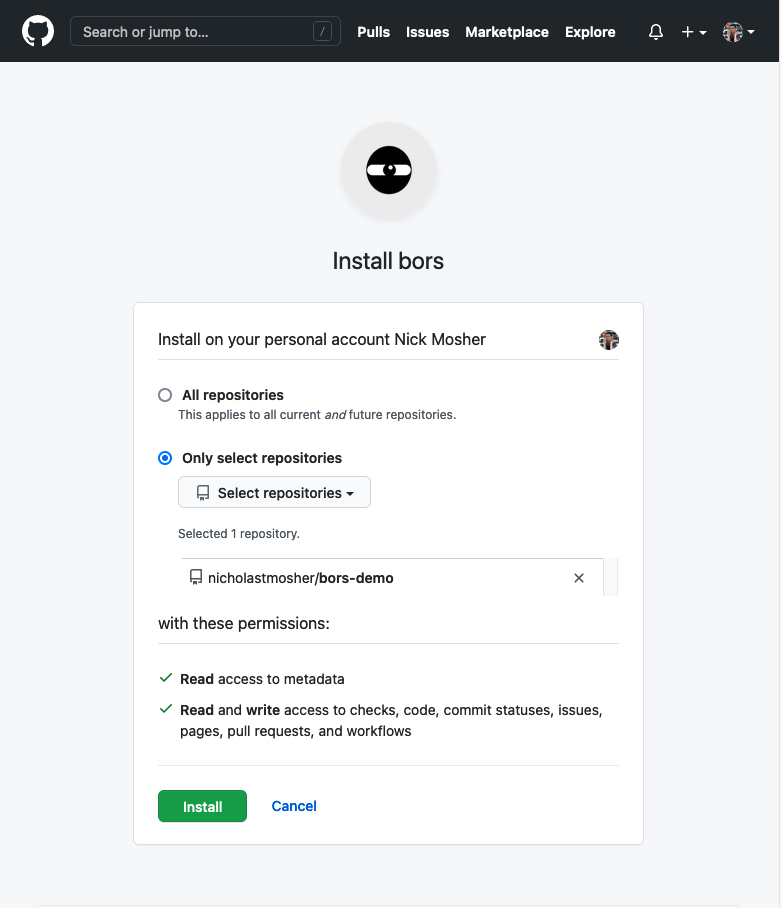
The first page should ask you which GitHub account or organization to add Bors to. You’ll want to select the account which owns the repository you want. Note that if this is an organization, you need to have the appropriate access within the organization to add an application.

The next page will prompt for whether you want to add Bors to all the repositories on the given account or just a specific one. I always recommend choosing specific access for things like this, in order to grant the least amount of privilege to tools where necessary. You can always come back and add new repositories if you really like Bors.
At this point, you should be done setting up the actual Bors application. All that’s left to
do is set up the bors.toml configuration file in your repository to tell Bors which workflows
to monitor, and to set some options to customize the behavior for Bors on that repo.
Configuring Bors with a simple CI workflow
I’ve put together a small sample repository with a basic Rust project and a simple CI
workflow using GitHub Actions. I’ll talk through the key options in the bors.toml file and
how those options interact with the CI workflow.
First, let’s look at the CI workflow we’re working with. This has a handful of jobs that should be useful for any Rust crate.
# .github/workflows/ci.yml
name: CI

permissions:
  contents: read

on:
  workflow_dispatch:
  pull_request:
  push:
    branches:
      - staging    # Causes CI to run when Bors pushes to staging
      - trying     # Causes CI to run when Bors pushes to trying (bors try)

jobs:
  build:
    name: ${{ matrix.task.name }} (${{ matrix.os }})
    runs-on: ${{ matrix.os }}
    strategy:
      matrix:
        os: [ubuntu-latest]
        rust: [stable]
        task:
          - name: Format
            run: cargo fmt
          - name: Clippy
            run: cargo clippy
          - name: Build
            run: cargo build
          - name: Test
            run: cargo test
    steps:
      - uses: actions/checkout@v2

      - name: Install Rust ${{ matrix.rust }}
        uses: actions-rs/toolchain@v1
        with:
          toolchain: ${{ matrix.rust }}
          profile: minimal
          override: true
          components: rustfmt, clippy

      - name: ${{ matrix.task.name }}
        run: ${{ matrix.task.run }}

  # This job should depend on all required jobs.
  # We will make Bors watch this job to tell whether to merge or not.
  done:
    name: Done
    needs: [build]
    runs-on: ubuntu-latest
    steps:
      - name: Done
        run: echo Done
This workflow creates four jobs for building and testing our Rust crate,
and creates one job that depends on all the other jobs passing. The reason
for setting it up this way is that Bors needs to know which jobs must pass
in order to merge to master, which must be specified by name. Unfortunately,
GitHub’s default job naming scheme is somewhat nuanced and confusing, and
it can be tricky to remember exactly how to specify those job names in the
bors.toml. Instead of bothering to remember all of those rules, I like
to just create one simple “Done” job that only runs when all the required
jobs pass. Then, all we need to do is tell Bors to watch for the Done
job to complete.
# bors.toml
status = [
    "Done",
]
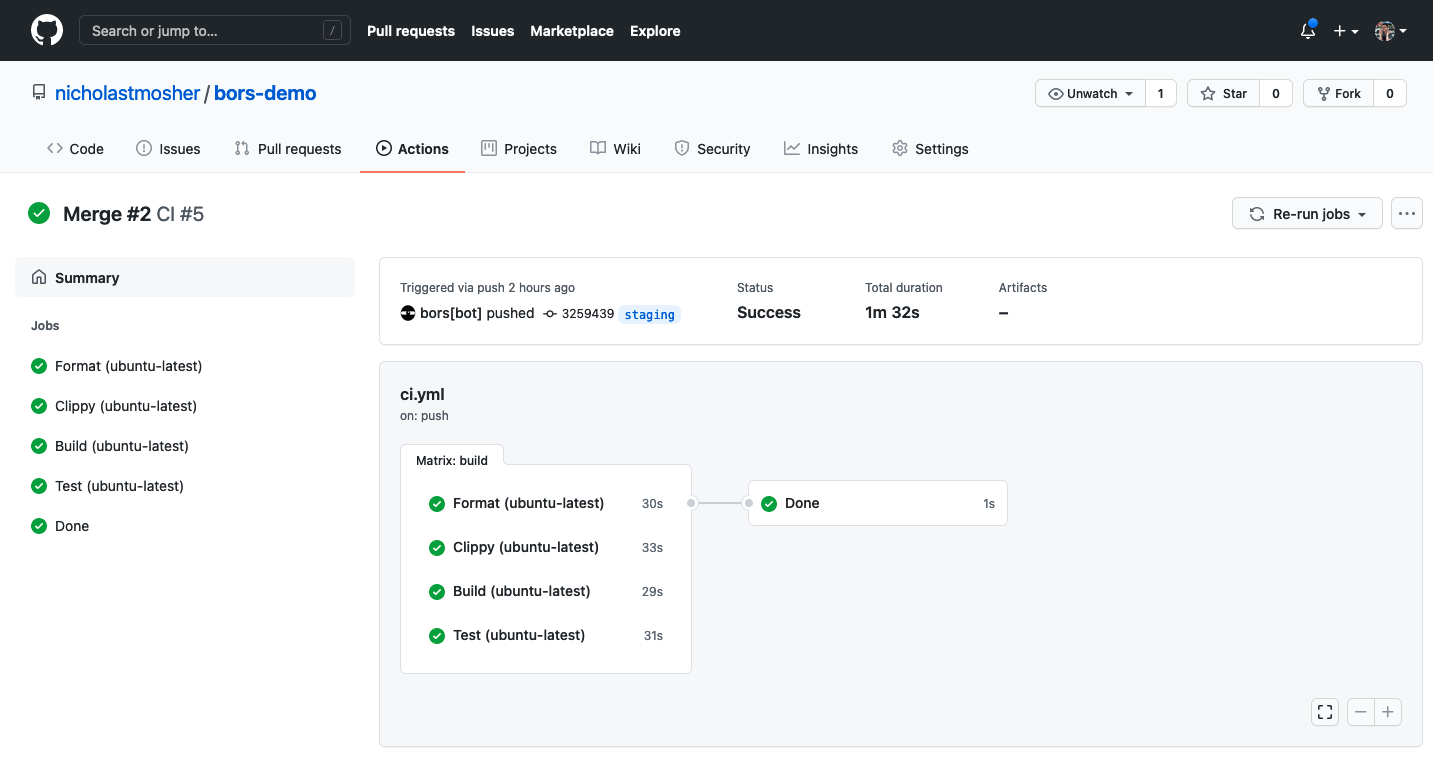
At this point, Bors should be up and ready to go. If you open a PR and comment “bors r+”, within a minute you should see a notice that “Bors has added a commit that references this pull request”. You can click on the yellow bubble next to that commit to view the status of the CI workflow that Bors is watching.
Bors config pro tips
The bors.toml I showed above is the most minimal configuration you can use
to get up and running with Bors. However, there are some other Bors options and
GitHub repository options that we can use to make things nicer and more foolproof.
I have a few big points I want to walk through:
- Configuring Bors to use squash commits
- Disabling the Big Green Merge Button
- Specifying a minimum number of PR approvals
Using Squash Commits
A squash commit is a way of taking all the commits on a branch and “squashing” them down into one commit. This is very useful for minimizing the amount of noise in the commit history. Bors supports a form of commit squashing in which it does the following:
- For every PR in the ready queue, it squashes that PR’s branch into one commit
- The PR title and description are used as the commit’s message
- It then cherry-picks each squashed commit into the staging branch
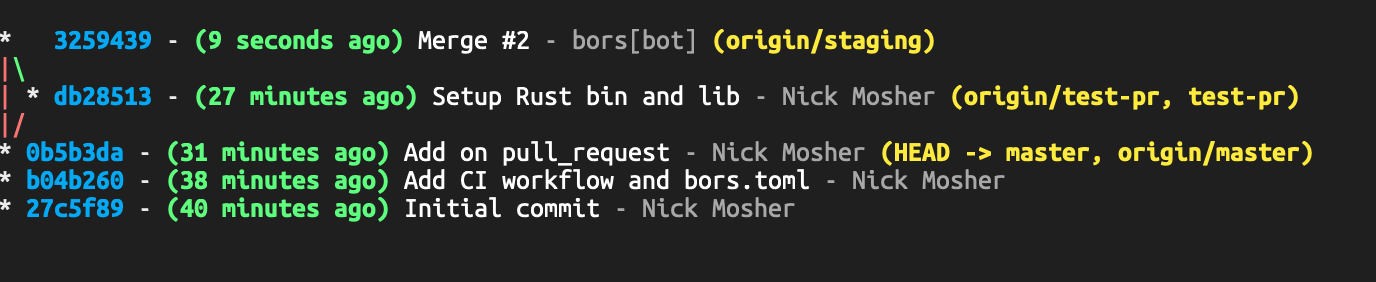
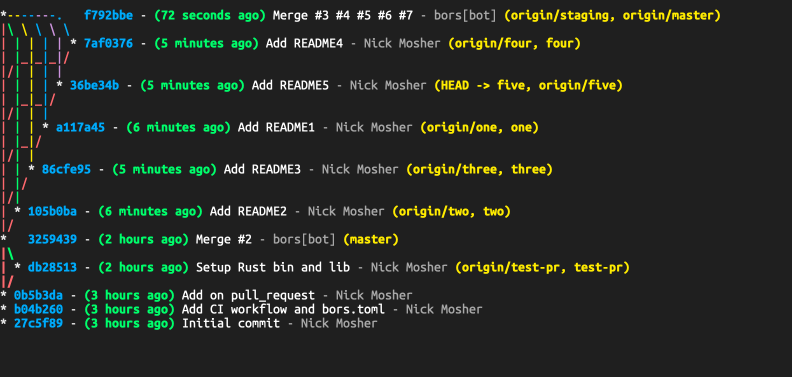
To illustrate how merging versus squashing impacts your git history differently, I made five branches originating on master and used “bors r+” on all of their PRs at once. This first image shows the resulting history when using plain merges.
And this next image shows the resulting history when using squash merges.
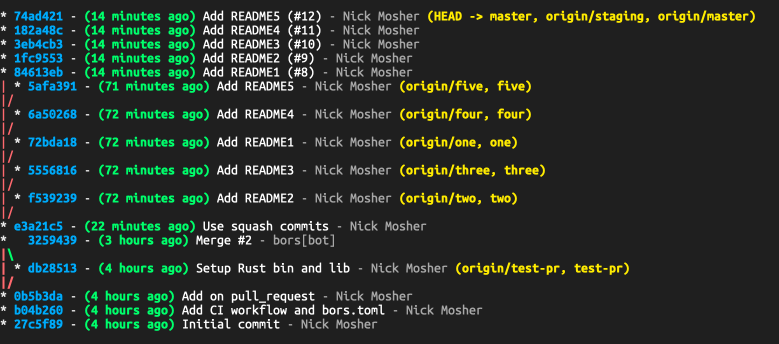
We tend to prefer the squash merges because of the tidier history, but you can decide
for yourself which mode works best for you. To enable squash merges, simply set the
use_squash_merge configuration in bors.toml:
# bors.toml
status = [
    "Done",
]
use_squash_merge = true
Disabling the Big Green Merge Button
When we started considering the Bors workflow, we wanted to make sure that there was no way for developers (present or future) to get confused about the merging process. If we were going to be using Bors and closing PRs using the “bors r+” command, we did not want it to be possible for newcomers to use GitHub’s merge button to accidentally bypass the Bors merging process.
We discovered that we could practically disable the button by adding a branch
protection rule requiring the “bors” status check. This is effective because
the bors status check only passes when bors witnesses a passing CI workflow
on staging. By that time, Bors will have merged and closed the PR, so the button
will not be available anyway.
In repositories where you have administrator privileges, adding this branch protection rule will demote the Big Green Button into the Red Admin Override Button, but it is still a good visual indicator that you should not press the button. Plus, if you are an administrator, you probably know to use Bors instead.

In repositories where you do not have administrator privileges, the button is disabled completely.
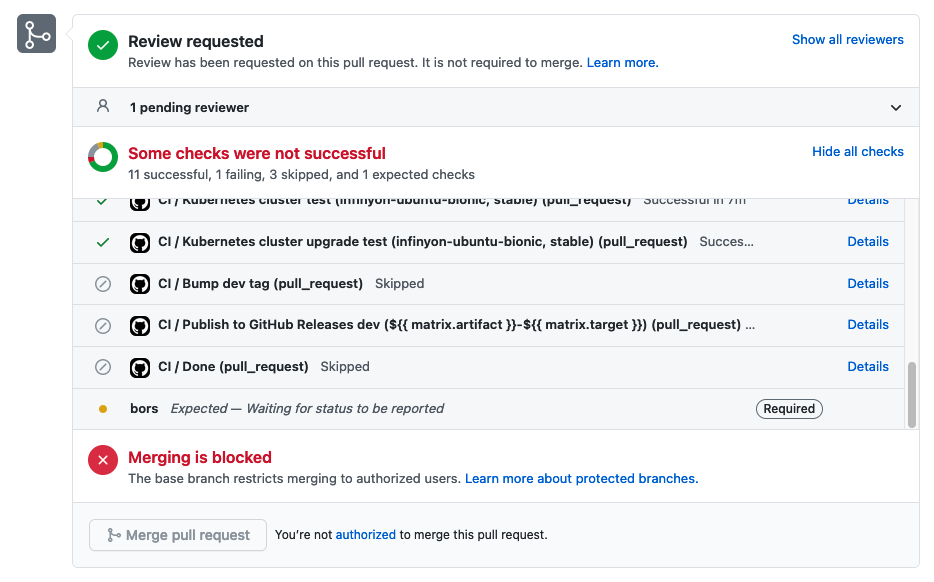
Specifying a minimum number of PR approvals
One big question we had before adopting Bors was: “Will this change the way that we need to do reviews?”. When looking at the Bors reference, it seemed almost like Bors was introducing its own review system. There are extra Bors commands such as “bors delegate+”, or “bors delegate=[list]” which seemed to allude to a custom reviewer flow.
While we have not yet tested out how the “delegate” commands work (we have not needed to), we did find this tidbit in the reference that seemed to answer our question:
required_approvals: Number of project members who must approve the PR (using GitHub Reviews) before it is pushed to master.
Perfect. So we do not need to know any other Bors commands or complicated workflows in
order to conduct our reviews. However, there is a small nuance to be aware of. If you
are setting a minimum number of reviewers, you should use the configuration in bors.toml
rather than a branch protection rule on GitHub. If you use only a branch protection rule,
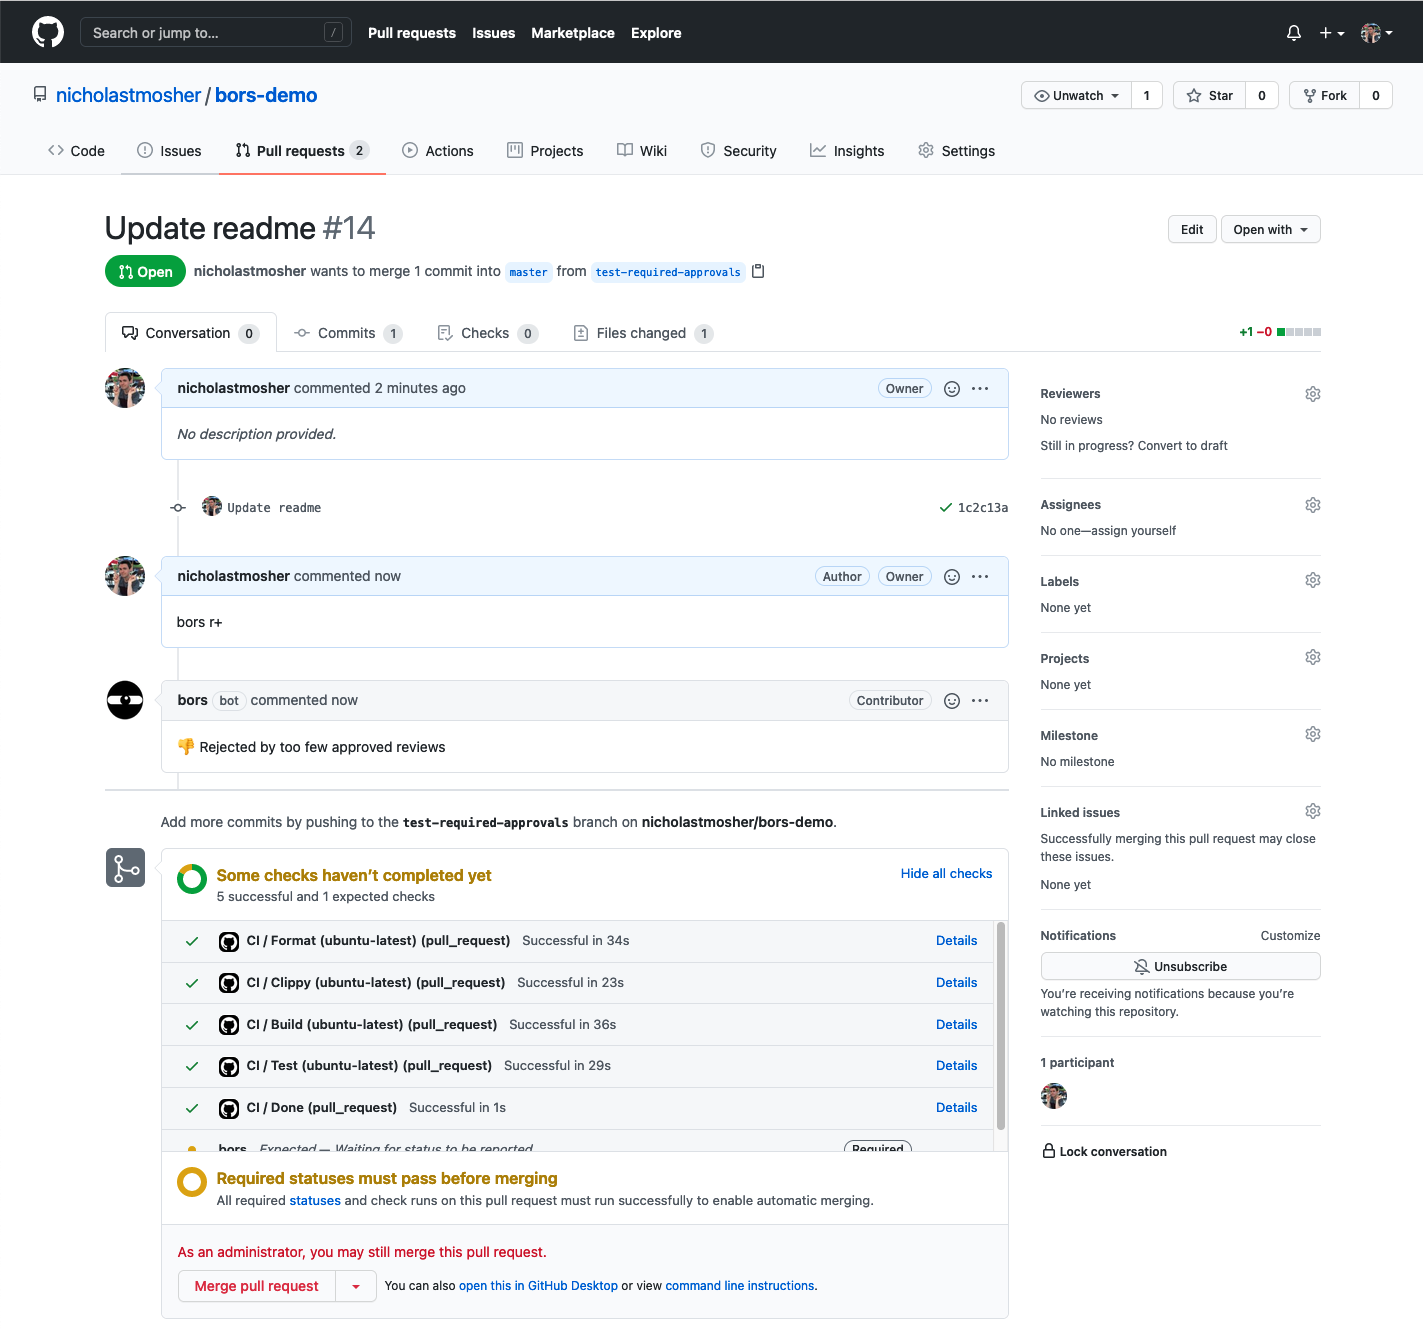
then Bors will inevitably encounter errors when it tries to merge a PR with zero approvals
into a protected branch. This results in an ugly API error on the Bors console rather than
a tidy Bors message.
The proper way to set a number of reviewers with Bors is with the required_approvals config
in bors.toml:
# bors.toml
status = [
    "Done",
]
use_squash_merge = true
required_approvals = 1
Conclusion
I hope you found this post interesting and useful, and I encourage you to try out Bors on your own repositories! It is freely available for open-source repositories but unfortunately the publicly-hosted instance does not work with private repositories. I will be writing a follow-up blog in the coming weeks about how we took Bors a step further and used it to create a fully automated release pipeline. If you’d like a sneak-peek at how that all works, feel free to check out our workflow configuration on Fluvio. I would also like to thank the team over at bors.tech for creating and maintaining such a wonderful and freely available tool!
Feel free to reach out with any questions on Twitter, Reddit, or our Fluvio team Discord, I love to hear from interested readers!