Stateful Services (private release) Build composable event-driven data pipelines in minutes.

Request access

How to Link Zapier and InfinyOn Cloud

If you’re using both Zapier and InfinyOn Cloud, integrating the two can supercharge your workflows. Zapier’s automation prowess can link up with InfinyOn Cloud’s robust data streaming, allowing you to move and transform data and trigger actions seamlessly between them. This can not only save you time but also unlock new possibilities for your real-time data.

To follow along in this guide you need:

  • Access to Zapier Premium apps
  • InfinyOn Cloud cluster
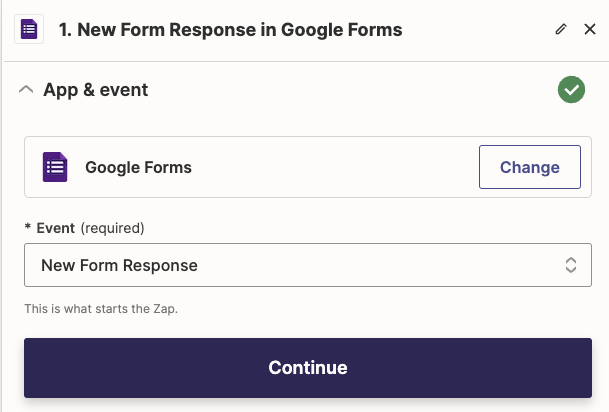
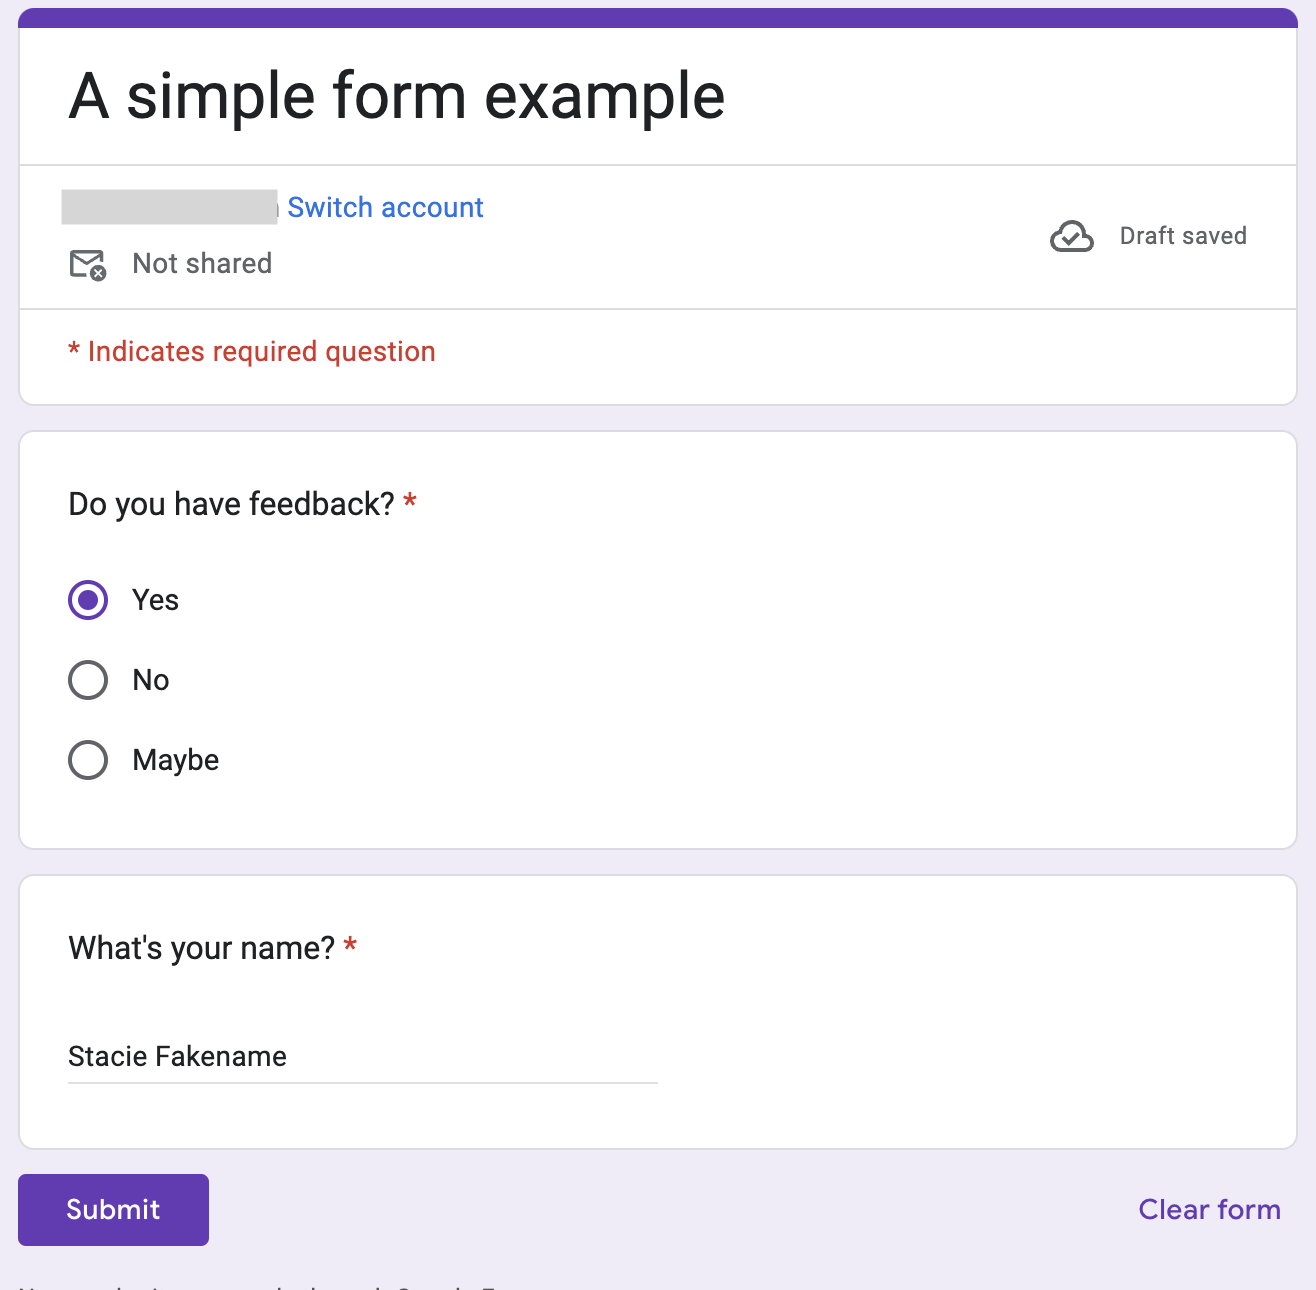
  • Google Forms trigger to Zapier
  • Google Sheets trigger to Zapier
 

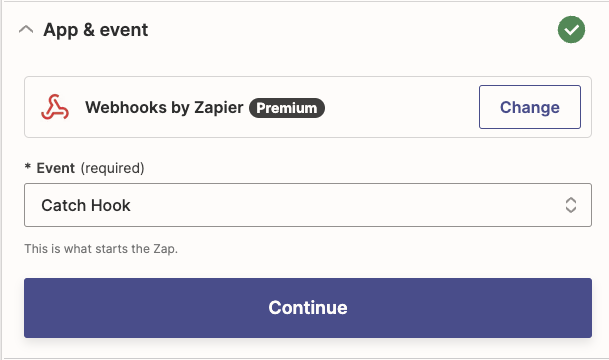
Linking Zapier to InfinyOn Cloud

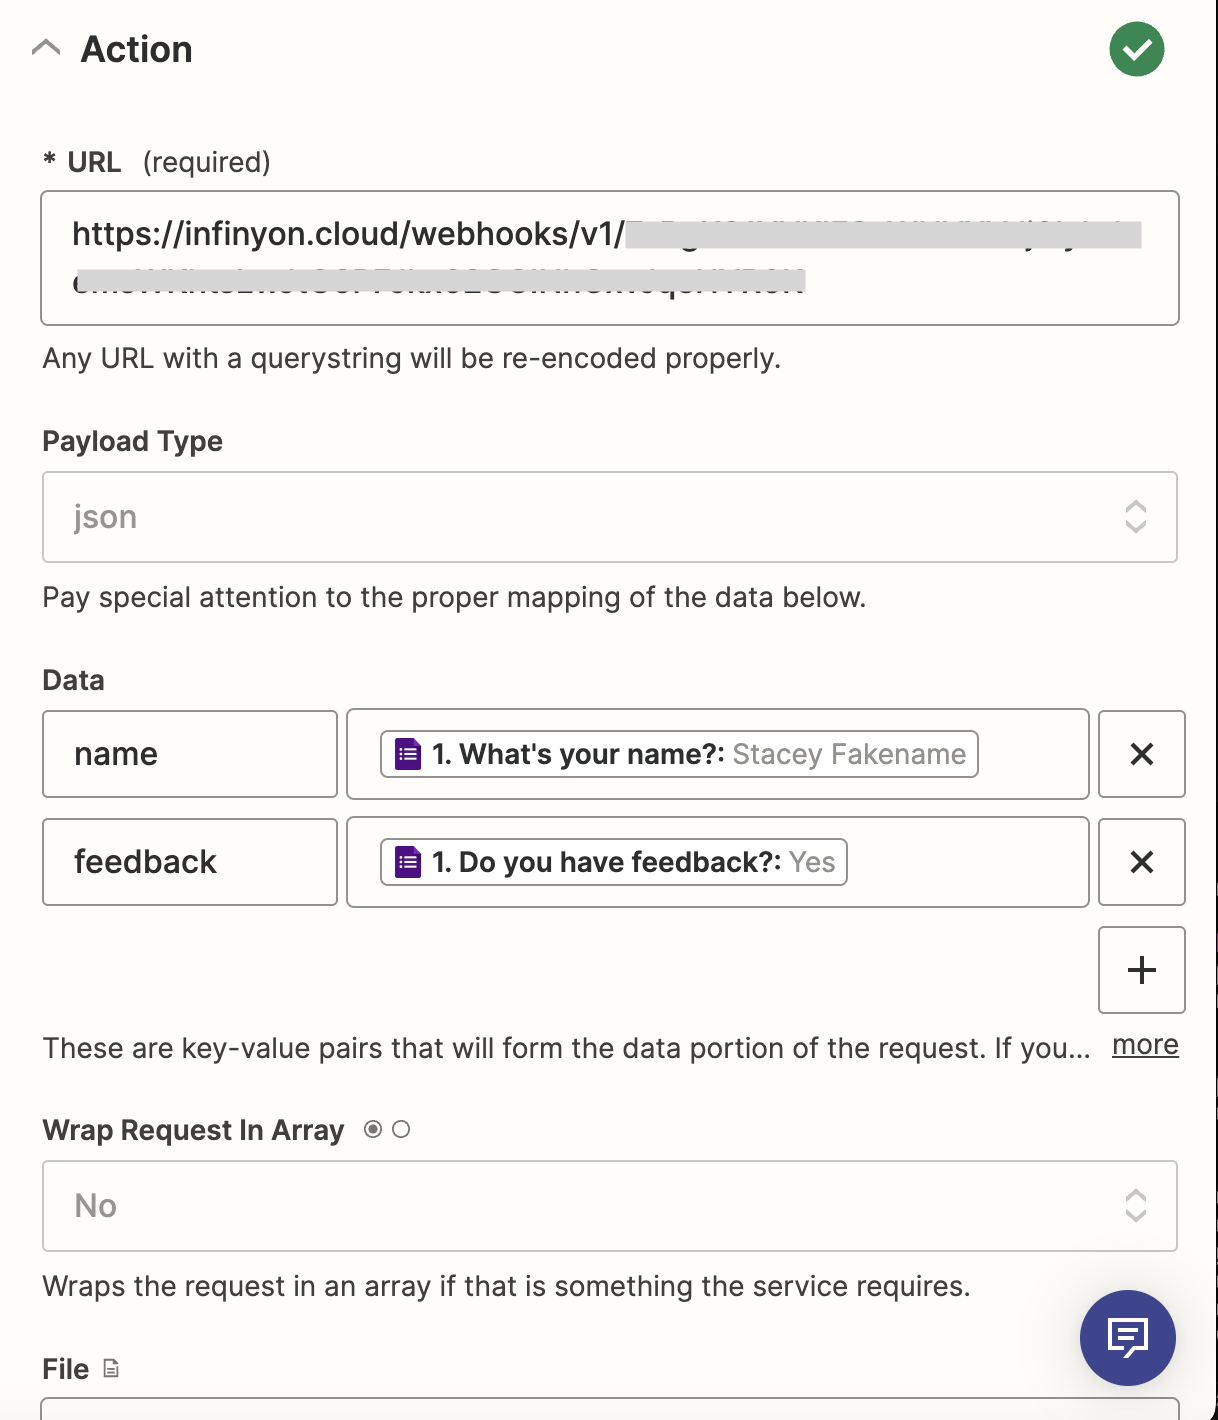
This section covers sending events from Zapier Zaps to InfinyOn Cloud Webhooks.


Pre-requisites

  • An InfinyOn Cloud account
  • fluvio CLI installed connected to Cloud account with fluvio cloud login
  • A Zapier account with access to Zapier Webhooks
  • A Zap trigger. This example will use new survey responses from Google Forms
 

On InfinyOn cloud cluster

First step is to create a webhook in Infinyon Cloud.

Copy the following example webhook config file and save as example-webhook.yaml

# example-webhook.yaml
meta:
  name: from-zapier 
  topic: zapier-events 

# optional
webhook:
  outputParts: body 
  outputType: json

Then run fluvio cloud webhook create to create the webhook

$ fluvio cloud webhook create --config example-webhook.yaml
Webhook "zapier-events" created with url: https://infinyon.cloud/webhooks/v1/[random string]

We’ll use the url for the next step in Zapier


In Zapier dashboard

  • First thing is to create or modify an existing Zap. - We’ve created a new Zap that triggers whenever a new response to our Google Form survey arrives
    • We won’t cover the configuration of Google Form trigger further in this example
 

Configuring Webhooks step

  • Add a step and choose the Webhooks by Zapier action

  • Under App & Event, select a POST event and click continue

  • Under Action, for the URL field, paste the URL for your InfinyOn Cloud webhook

  • Map the answers from survey with keys to form into json to InfinyOn Cloud and click the continue button


Test the Zapier to InfinyOn Cloud workflow

Test the event gets sent to InfinyOn Cloud In a terminal create a CLI consumer for the webhook’s with the following command:

$ fluvio consume zapier-events
Consuming records from 'zapier-events'

In our example, we have two fields

Send a new Google Form response

Then click the Test Step/Retest button test triggering the event with our survey response from the previous step.

In our consumer terminal, we get this example output:

$ fluvio consume zapier-events
Consuming records from 'zapier-events'
{"name": "Stacey Fakename", "feedback": "Yes"}

Then you can click Publish to save this Zap. It is ready for production! It is ready to send data to InfinyOn Cloud.

The rest of this guide will cover data flow in the opposite direction.


Linking InfinyOn Cloud to Zapier

This covers triggering Zapier Zaps with InfinyOn Cloud’s outbound HTTP Connector


Pre-requisites

  • An InfinyOn Cloud account
  • fluvio CLI installed connected to Cloud account with fluvio cloud login
  • Zapier account with access to Zapier Webhooksdd
  • An action to save event from a trigger (We’re using Google Sheets)
 

In Zapier dashboard

  1. In Zapier, create a new Zap that is triggered by webhook. Copy the Zapier url for the next step
  • For our example action we will add a row per InfinyOn Cloud event into an existing Google Sheet with 2 columns

In the Test section, copy the url. We need this webhook url to configure InfinyOn Cloud as a data source for this Zap.

We’ll pause on configuring this Zap for a moment, and be back after the next section.


On InfinyOn Cloud cluster

  1. In InfinyOn Cloud, we need to create an outbound HTTP connector.
  • Replace the url from the previous step for the endpoint field.
# zapier-connector.yaml
apiVersion: 0.1.0
meta:
  version: 0.2.5
  name: zapier
  type: http-sink
  topic: cloud-event
http:
  method: POST
  endpoint: https://hooks.zapier.com/hooks/catch/########/xxxxxxx/

Then create the connector with the following command

$ fluvio cloud connector create -c zapier-connector.yaml

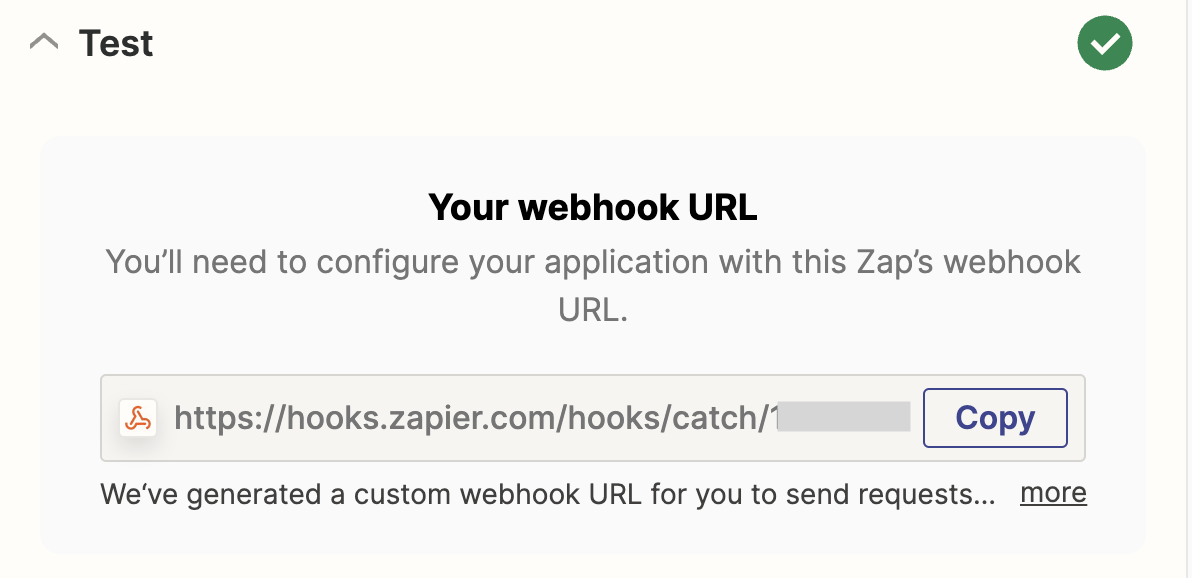
Data that is sent to the cloud-event topic will be sent as HTTP POST to the Zapier workflow.

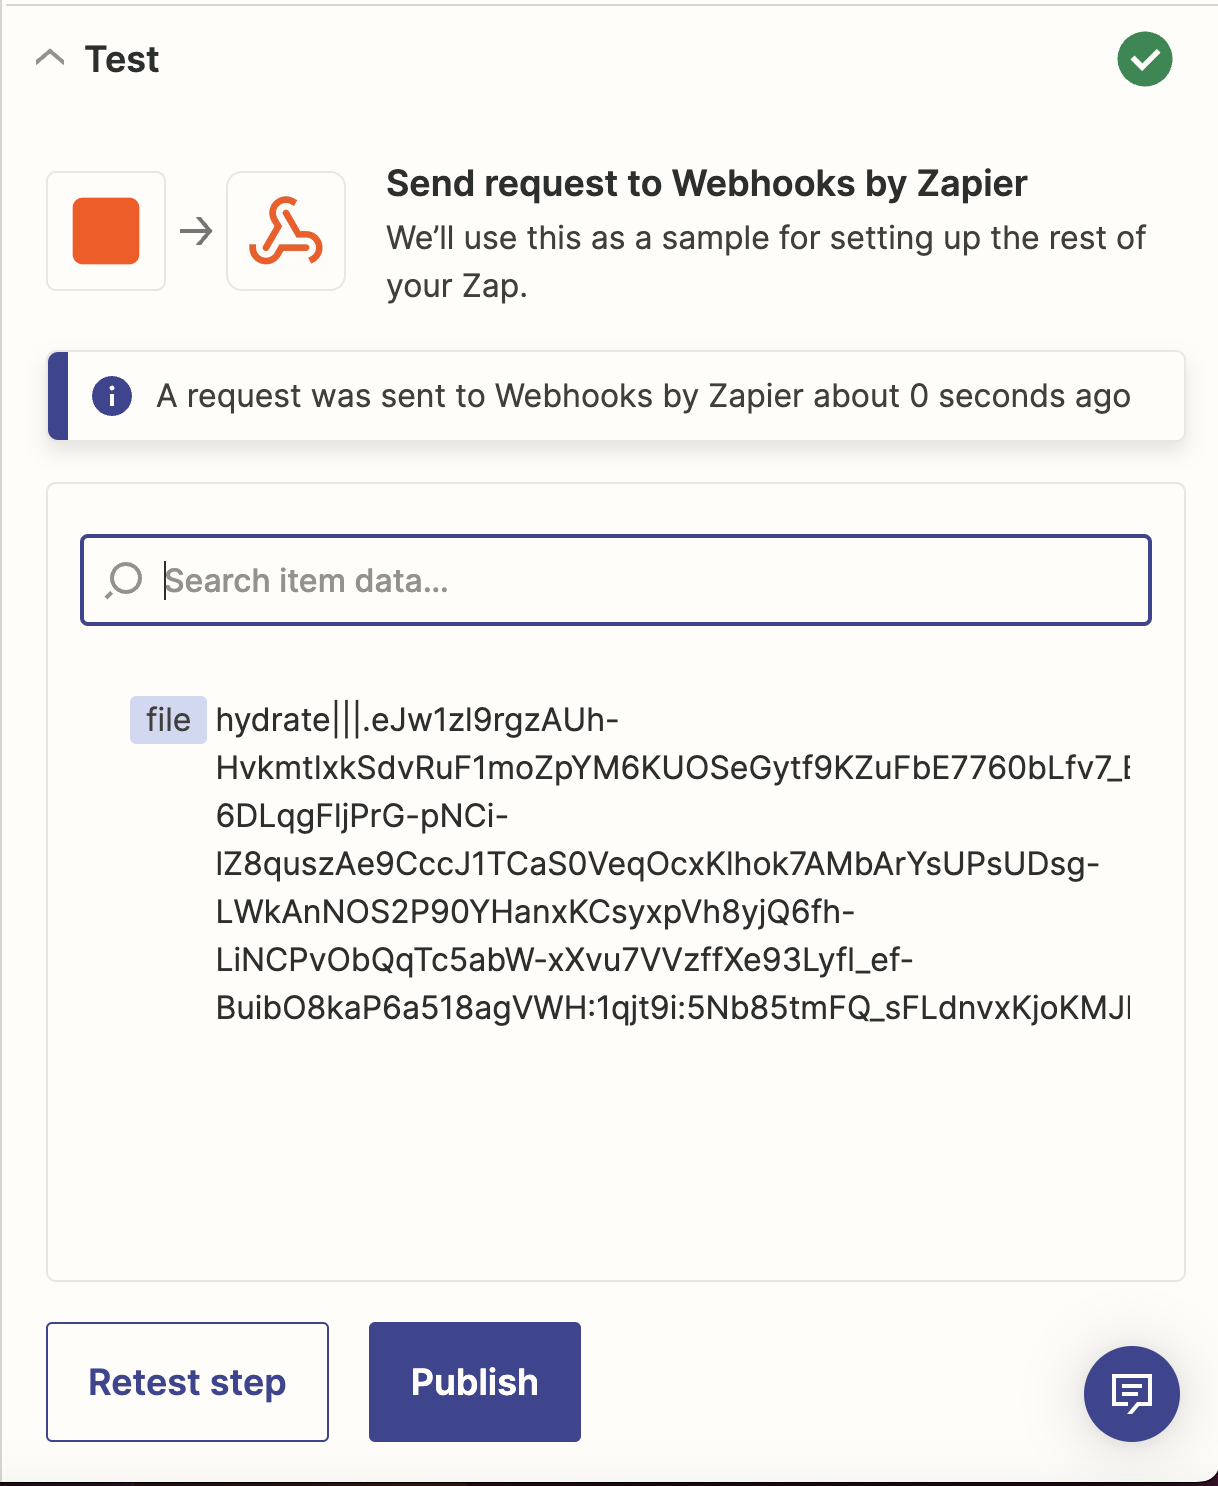
In the next section we’ll test the end to end. But first we’ll send some data to test the event triggers the Zapier Zap

  • Create a CLI Producer to the connector’s cloud-event topic
$ fluvio produce cloud-event
> {"full_name": "Stacie Fakename", "data": "Hello from Cloud"}
 

Test the InfinyOn Cloud to Zapier workflow

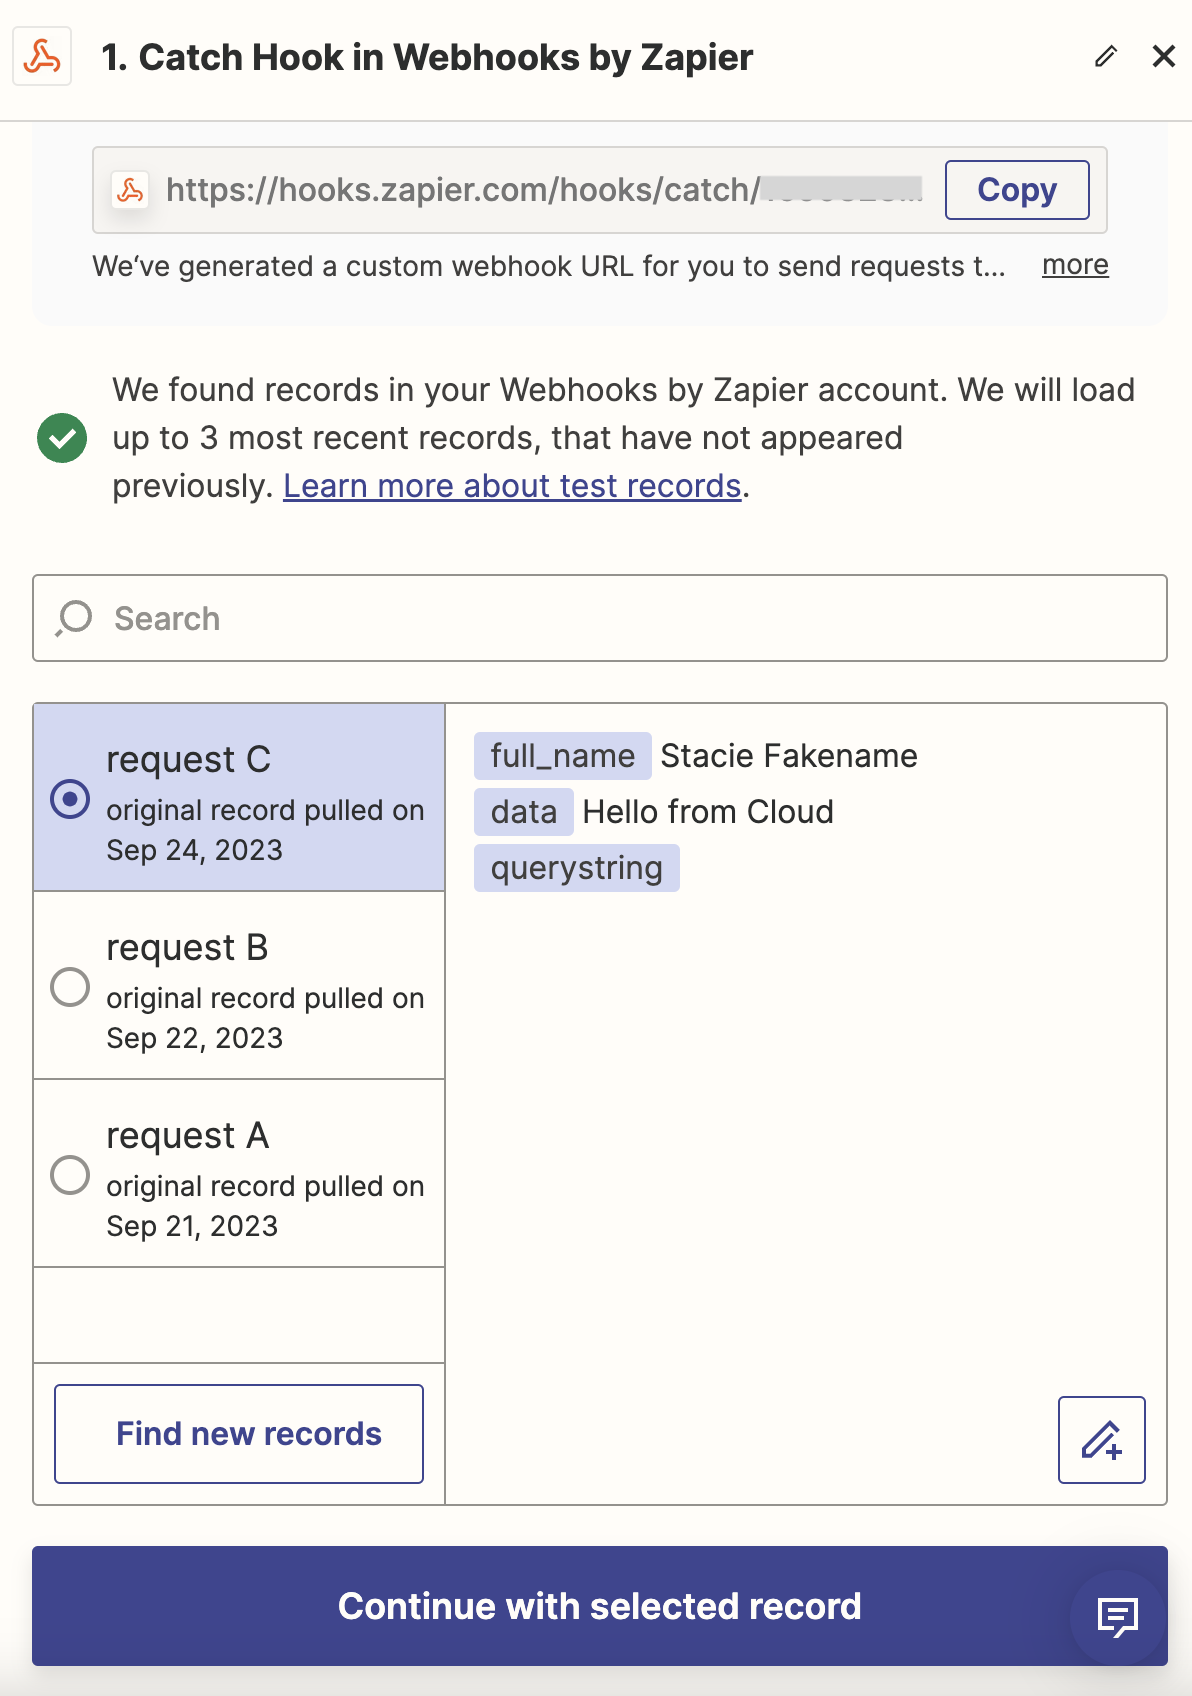
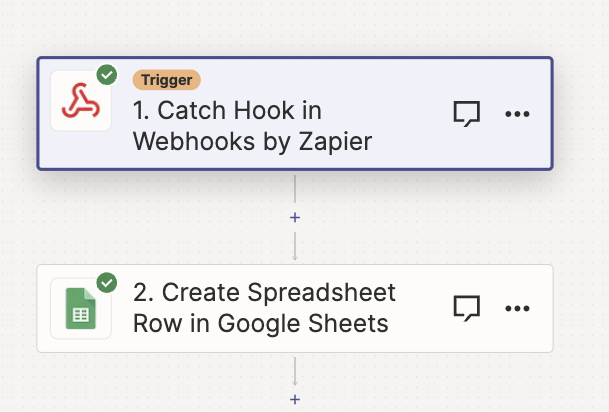
Back to Zapier to edit the webhook Zap. Click Find New Records to see the data we sent from the previous step. Click the Continue with the selected record button.

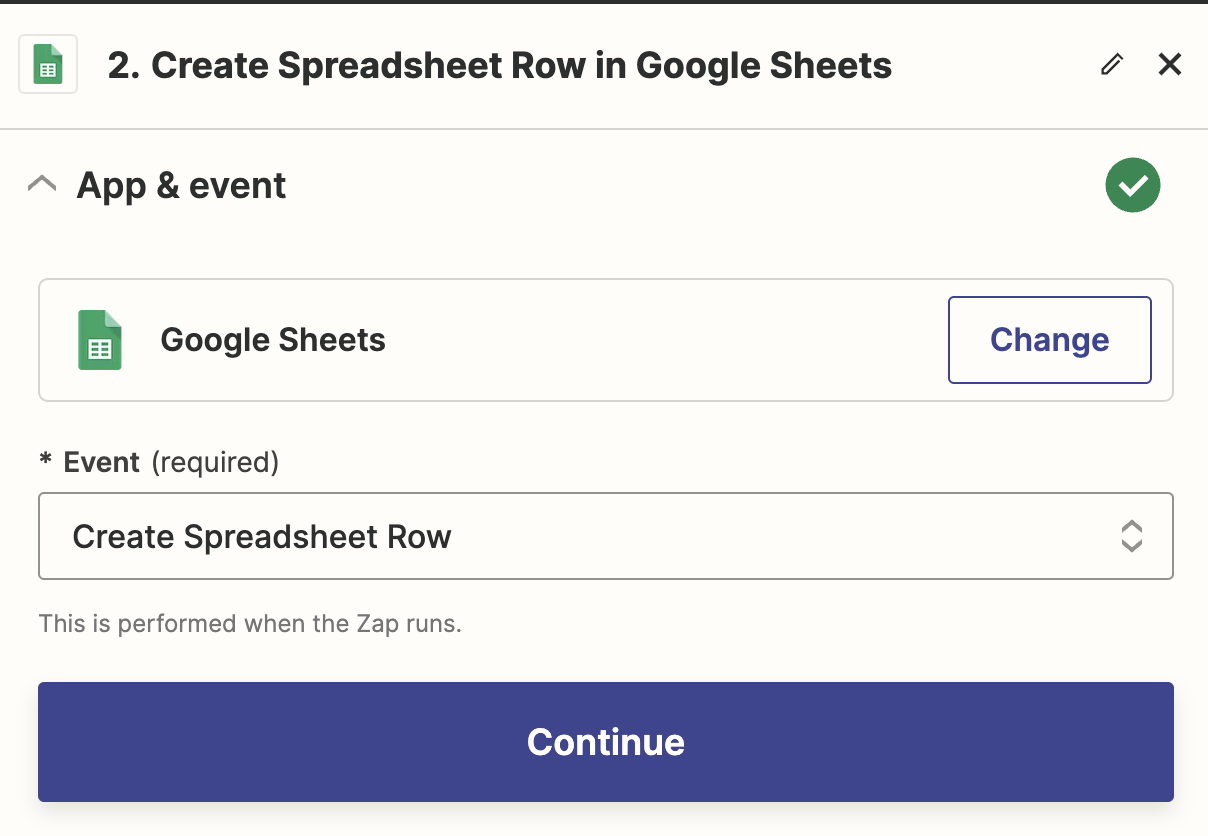
  • Create a new step. Select Google Sheets

  • We want to create a new row in Sheets. Select Create Spreadsheet Row.

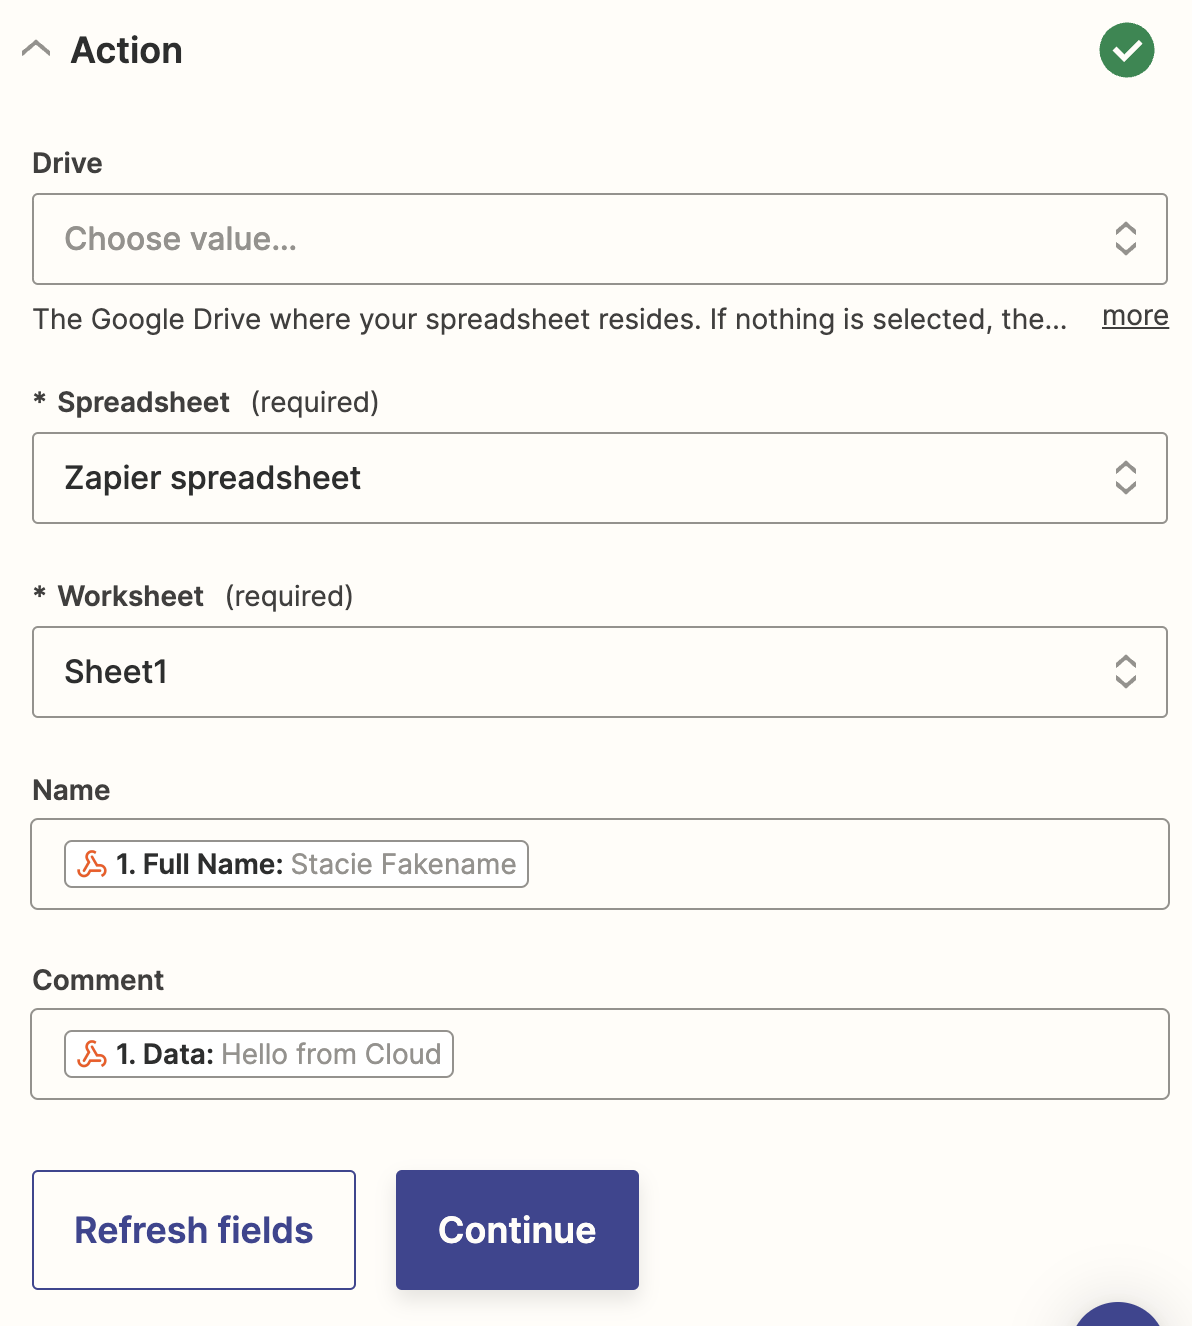
  • In the Account section, you’ll link your Google account to link to Sheets. This step won’t be covered in detail

  • In the Action section, select a spreadsheet with column headers, and select Refresh fields to populate the section with inputs. Map the webhook fields from the trigger to fields in the spreadsheet and click continue.

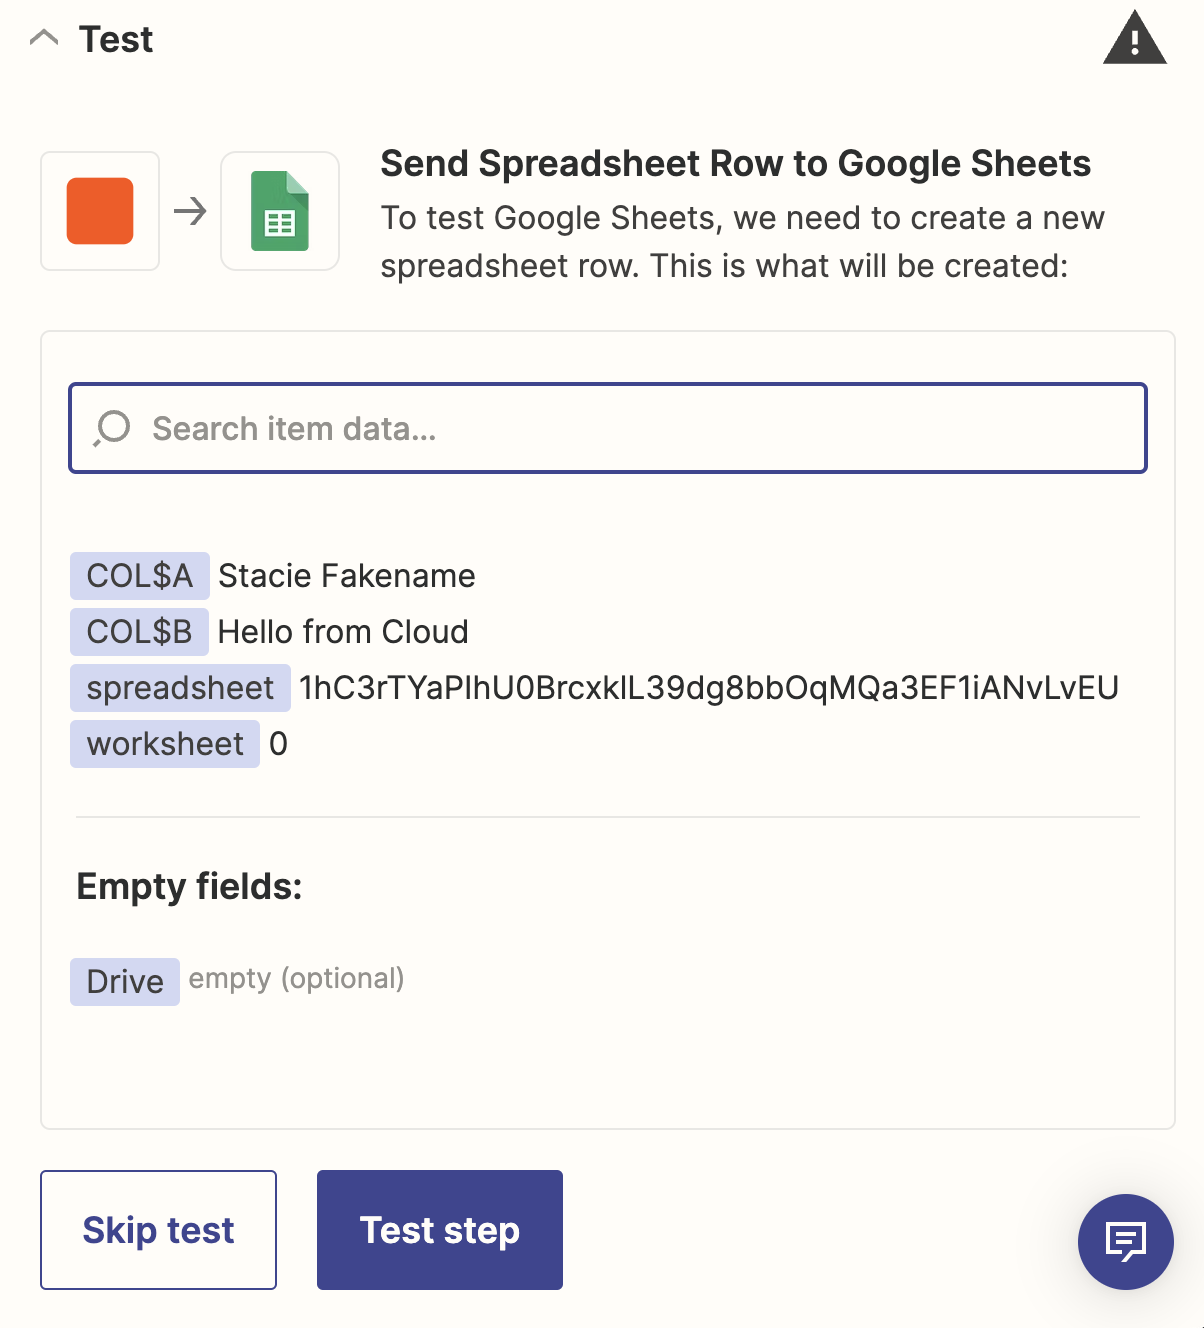
  • In the Test section, click Test/Retest step to create a row in the spreadsheet with the webhook data.

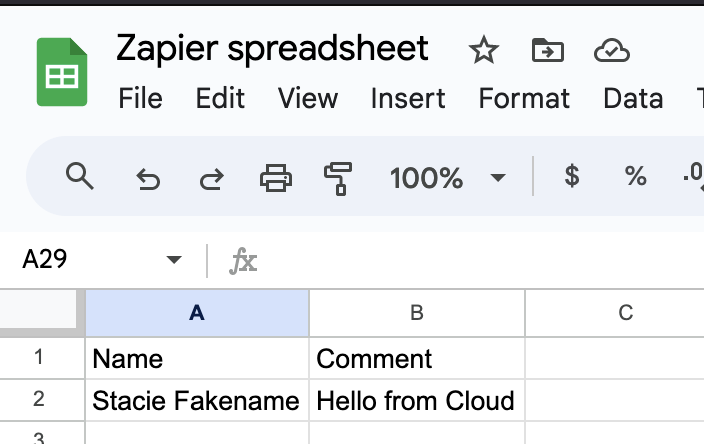
  • Confirm in the spreadsheet that the data is mapped into the columns.

Then you can click Publish to save this Zap to put it into production. It is ready to trigger from InfinyOn Cloud events.

This is the end of the guide. You should now have bi-directional data flow between Zapier and InfinyOn Cloud.